Email marketing is an effective and intimate way of reaching your audience. It can also be very cost-effective. Paid advertising works well but it can be expensive. Email marketing (as long as you do a lot of the footwork yourself) can be pretty cheap. It’s where I started and from my experience is incredibly powerful!
If you build a list in the right way, recipients will be very receptive to your messaging and content. It will help you sell more books when combined with your other online marketing activities. In this section we’ll show you:
- Different kind of “bait” you can use for your list generation campaign
- What tools work well for this task
- How to set up an email list generation campaign
Get Your First 100 Subscribers
We are going to start small here and build up. Don’t think you need to get thousands of subscribers to make an impact or do it all in a short period of time. Yes it may be a long-term goal to grow your subscriber list to that size but don’t overwhelm yourself.
Shoot for getting your first 100 subscribers using some of the methods we are about to outline. Once you have reached that goal, set another goal based on how successful you were with the first. Much of marketing and selling is developing theories, executing and then adjusting your strategy.
As you read this list of ideas, start to brainstorm how you can apply this to your book / genre. Then right after this we’ll walk you through exactly how you can implement these ideas by setting up your email and ways to capture emails.
Content as Bait
The type of business you run would determine what you have at your disposal to get people to give you their information and in the case of authors, that “bait” will most likely be content . Within the author category, whatever your book is about will determine how the content you offer can be shaped. Here are some ideas that authors can use as bait for people to sign up to their email list:
Chapters of Your Book: No matter what your book is about, whether non-fiction or fiction you can entice people to get a sneak peek by offering a few chapters of it free for download in exchange for an email address. This is effective because you know those people subscribing have a genuine interest in your book (the very thing you are trying to sell).
Entire Book: Let’s say you’ve written several books now, maybe a series, and you are looking to get subscribers. A great way to get subscribers is to give away your first book or “a” book for FREE. It not only will get you new subscribers, but it will help your other books to sell.
Supplemental Materials: If your title has content that contains supplemental materials (such as workbooks or enhanced computer content), you can leverage those materials as a lead generation tool. Offer supplemental materials for download in exchange for name and email.
Content Extras: When authors write a book, there are always things that get left out or needed to be cut for the final version. For fiction books this could be extra chapters and alternate endings. For non-fiction these could be material that could not fit in the final version of book. Whatever that content is, it can be used to generate leads.
Checklists: These work well for educational based titles or books that were written with the purpose of showing someone how to do something. Authors can come up with creative ways to take their readers to the next level. The author of a cookbook for example could come up with one page recipe check lists to help readers get organized.
Get Blog posts to Your Inbox: If you blog on a regular basis, you can get emails by offering to have people subscribe to your blog. You will want to be sure that you contribute content on a regular basis so you always have something to offer people.
You can get creative with your content bait or whatever it is you offer in exchange for people’s contact info. The content just has to have these characteristics:
- It should be relevant to an audience that would also be interested in purchasing your title(s)
- It should be compelling enough to make someone trade their information for it
List Building & Email Marketing Tools
We will focus on three email marketing and list building tools for this post. The web-based email software programs serve both the purpose of sending out marketing emails as well as managing lists of subscribers. The third program is designed to help non-programmer easily create landing pages and integrate them into a WordPress website. We’ll do an overview of these programs and then walk you through how to set up a campaign.
Aweber (OVERVIEW)
Aweber is known as an “op-in” email marketing service. Their specialty is subscriber-based email marketing programs (called broadcasts) where people submit basic information like a name and email and are then subscribed to automated work flows of emails that get sent out on a regular basis.
For example you may visit your favorite online retailer and see a signup form saying that you can keep up to date on sales the retailer is having by submitting your name and email address. If that retailer were using Aweber, they would build the form using Aweber, information submitted by visitors would go to Aweber’s system and an automated email would be sent to subscribers (for example a welcome email) along with subsequent sales-related emails (or whatever the retailer had designed).
Aweber is an excellent tool for building automated email marketing campaigns that attract people with compelling offers. For authors, those offers could be similar to the ideas outlined in the previous section.
MailChimp (OVERVIEW)
Mailchimp is similar to Aweber. Users can use it to market through email, upload their own contact lists or create an automation workflow where new subscribers sign up and are sent specific messages depending on why they submitted their information.
Once we move into the set up section of MailChimp and Aweber, you will notice the subtle differences between the platforms. For the purposes of marketing your title, they essentially do the same thing.
Leadpages (OVERVIEW)
Leadpages is a subscription service designed to help marketers easily create landing pages that help convert visitors. In other words, it allows you to build web page that makes your visitors complete some sort of action (in this case signing up for your offer and joining your subscriber list).
You can choose among dozens of templates, easily modify colors, fonts and other style options and it integrates with WordPress seamlessly. You can make it seem like it’s just another page on your author website.
How to Setup & Use Aweber
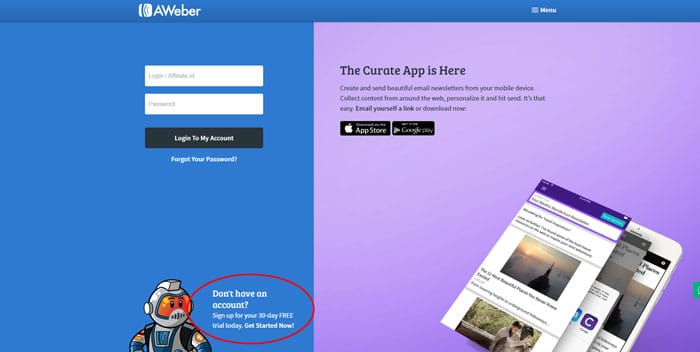
Aweber is a subscription email service so you’ll have to sign up for an account. At the time of this writing you can still sign up for a 30 day free trial though. Basic membership that includes unlimited emails and up to 500 subscribers (more than enough for the budding author marketing their book) is only 19 dollars per month. Pricing scales up from there. Click the ‘Free Trail’ button in the top right corner of any page to start the process.
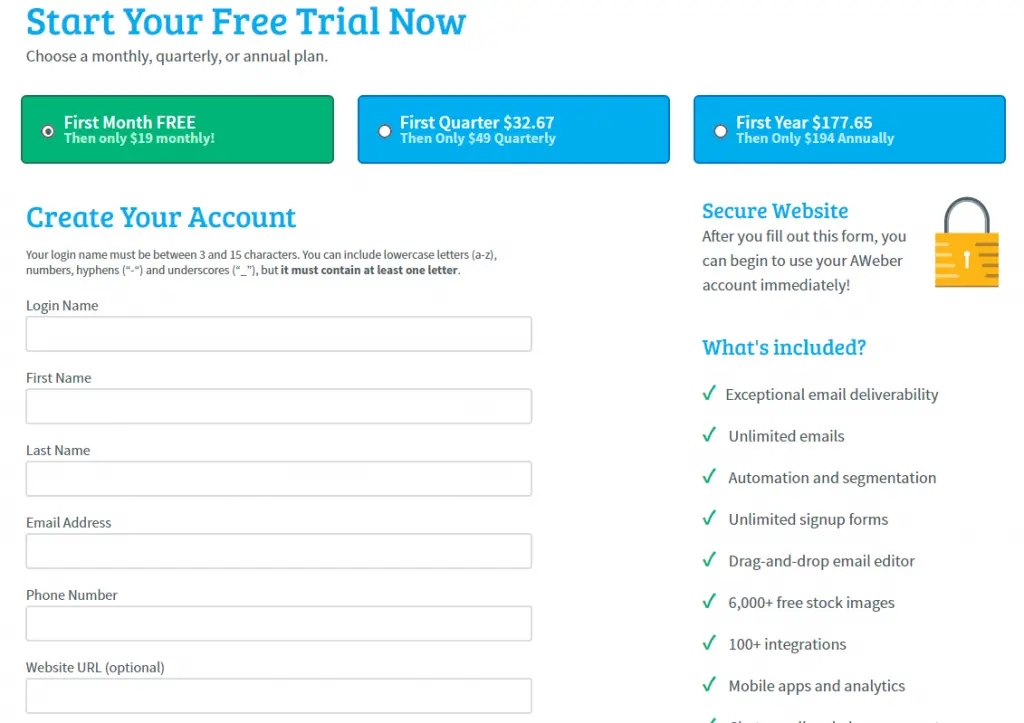
Select the plan that you would like and fill in your basic information including name, email, phone, URL, and company name. Even though you’re starting a free trial, Aweber still requires a credit card.
Setting Up Your Campaign
In Aweber we will be creating a confirmed opt-in campaign using a signup form integrated with Lead Pages and your WordPress site. In this section we will focus on setting up the Aweber portion of that process.

The process outlined by the graphic above is that someone will enter their information into your contact form (built in Aweber and LeadPages) and then automatically be added to your email list. They will then be sent a series of messages with content that they would enjoy leading up to a sales email at the end of the series.
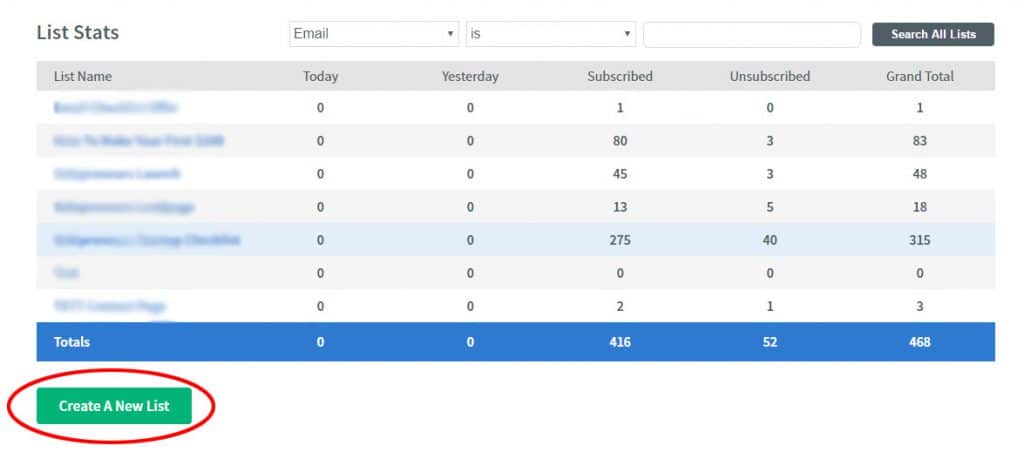
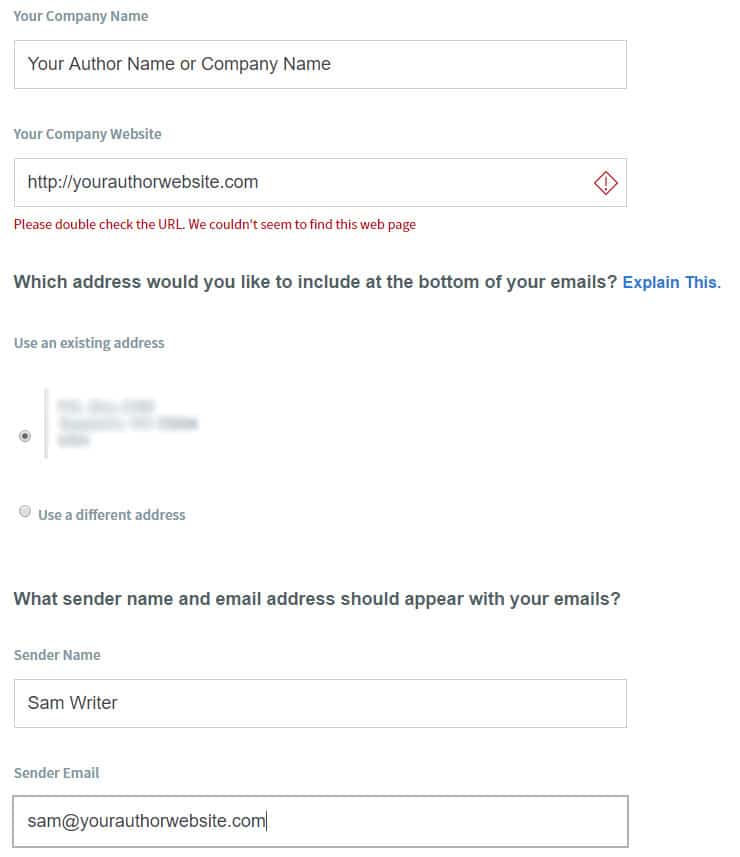
Step 1: Create a List
The list is the first thing you need to create in Aweber. Toward the bottom of the home screen of your account, click on the “Create a New List” button.
On the new list creation screen, enter in your company name and your website (these may both already be populated with your information). Select which address you would like to use in the footer of your emails (you can either use your account email or enter a new one).
Next enter your sender name and email address (hint: open rates tend to be better when you have a real person’s name as the sender’s name as opposed to a brand name). Then click ‘Next Step’.
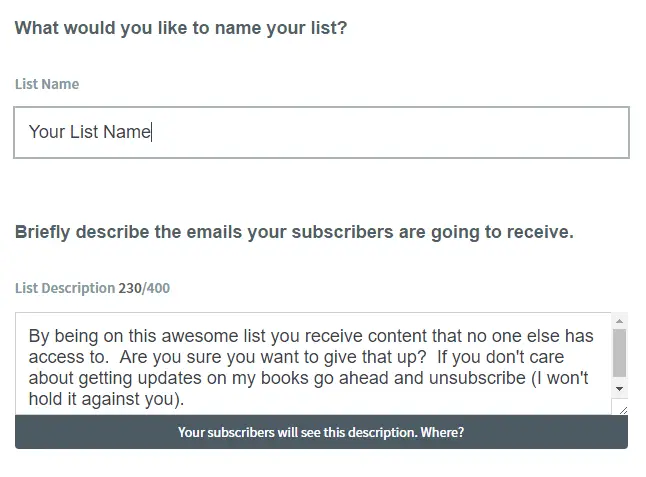
In the next step you’ll name your list and enter a brief description of the email your subscribers will receive. The list name is internal and for your use but the description will be seen by your subscribers. Subscribers will only be shown this description if they choose to unsubscribe from one of your lists (there should be a unique description for each list).
This is your chance to describe what people are missing by not being a subscriber to your list. Write compelling language here so that any people who do end up unsubscribing from your list think twice about it. Of course you cannot stop everyone but you can try.
Approving Your Confirmation Message
In the next step you will edit and approve your confirmation message. This is the email people will receive confirming that they do in fact want to be signed up for your emails. You will notice that there is a default subject line which you will have to request approval to change. The reason is because subject lines are often used to flag spam emails. Using the default subject line ensures your confirmation will get through.
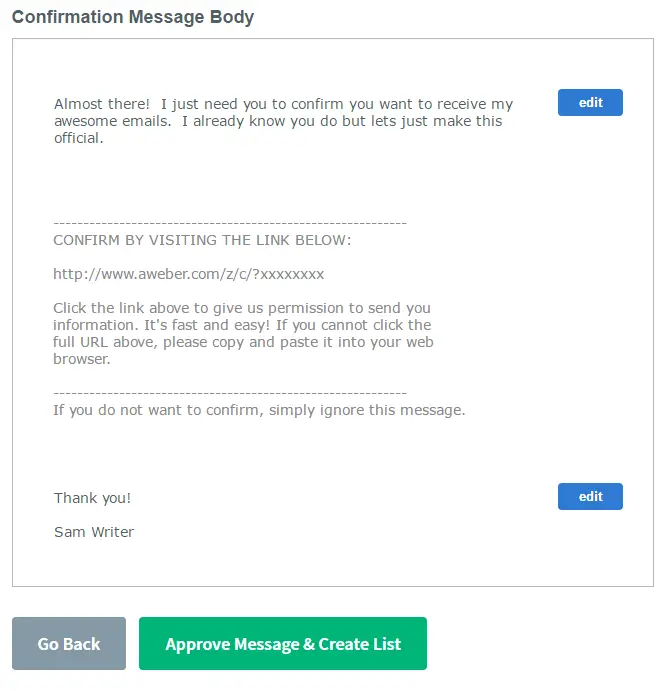
Once you are done editing, click “Approve Message and Create List”.
Step 2: Create a Follow-up Series
Now that you have a list created, you can create a follow up series or a handful of emails that will be sent to new subscribers over time. Remember that lists must be created first before you can create a follow up series. A followup series is simply a series of messages that you craft beforehand that get sent to new subscribers once they sign up for your list.
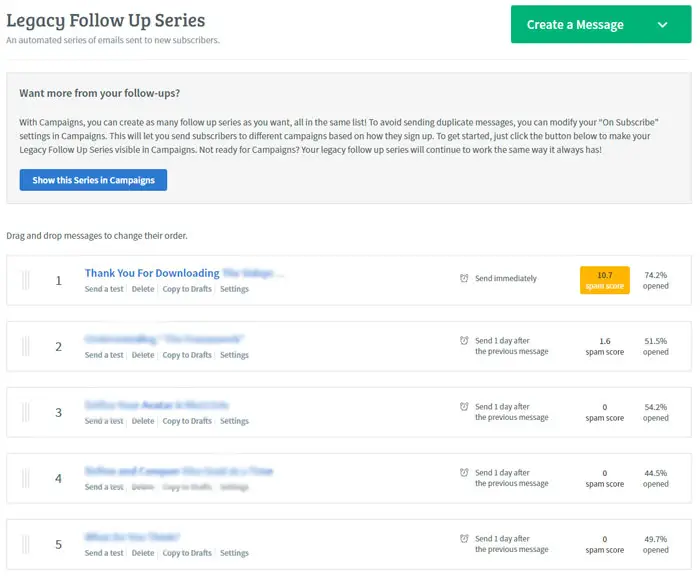
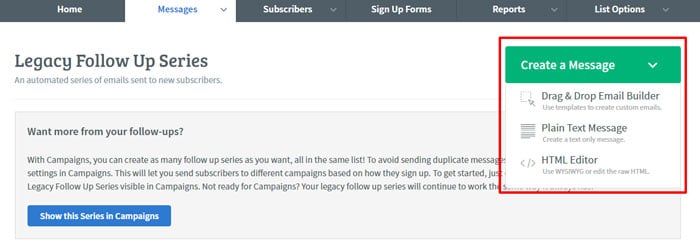
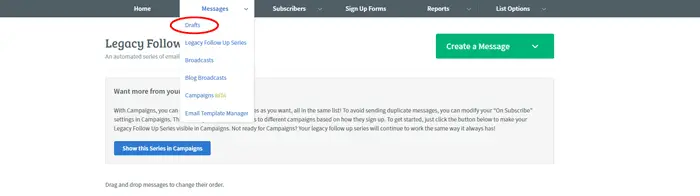
To start your follow up series go to Messages -> Follow Up Series (it may also say Legacy Followup Series).
You can choose among the Drag & Drop Email Builder, plain text or html. Use whatever you are comfortable with but most authors will want to use the drag and drop builder. It is the easiest way to make an awesome looking email without knowing any programming.
Choosing the drag and drop editor opens up an editing window where you can start building your email. This is the first email in your series and it should be a welcome email that welcomes people to your list. You should thank them for signing up and give them an idea of what kind of content they will be receiving from you.
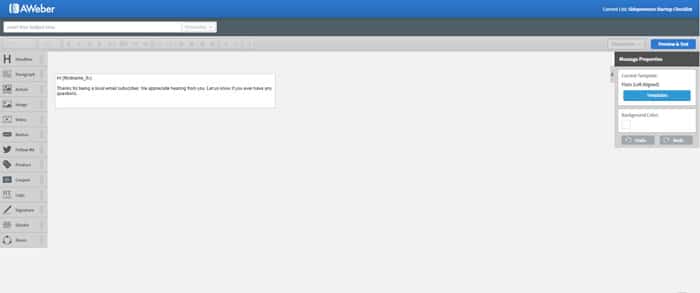
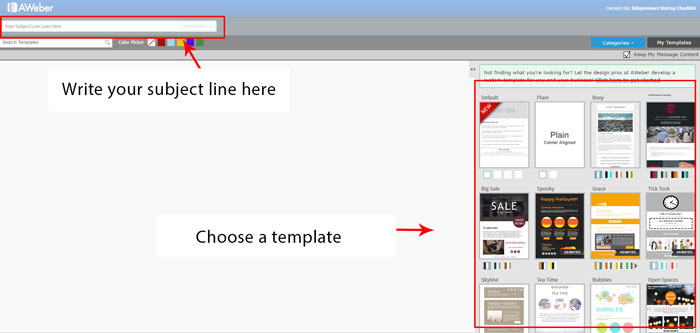
Add a descriptive subject line (for example that includes the words welcome or thank you). Next pick a pre-designed template from the templates menu.
Apply your template and then use the left sidebar menu to drag and drop elements into your email. You can add images, social buttons, text sections and more. Since this is your welcome email you will want to keep it short and sweet. Here are some tips to make your welcome email a hit:
- Remember to thank your new subscribers
- Keep text to a minimum. Get to the point in the first couple sentences
- Use headers and bullet points. Make your email easy to scan
- Provide a link to your website and social accounts
- Make your subject line compelling (this is what will grab someone and cause them to open your email
- Proof read! Make sure you proof your email before you save
Once you are satisfied with the way your email looks, click the save & exit button.
Repeat this process for other emails in your series. In our experience, a series of 4-5 emails works best. The content of each email will vary based on your unique author brand, what your title or titles are about and how you want to market your books. A good strategy though is to provide useful content that your audience will like. This should be outlined in the welcome email and each subsequent email should deliver on that initial promise. A series might look something like this.
- Welcome email (which we just explained)
- Email containing a brief message and a few links to blog posts you’ve written
- An email containing a link to a few chapters of your book for people to check out (in addition to what they may have already gotten access to)
- An email containing more content you’ve written or some other piece of useful information
- An email letting people know about your book and how they can purchase it (i.e. on your website, on Amazon, or some other market place)
You will have to repeat the drag and drop builder process in Aweber for each email you want to create. You do not have to stick to any set process but if you’ve never done an email series before, try our method first and test to see how it works for you.
Step 3: Adding Emails to Your Follow Up Series
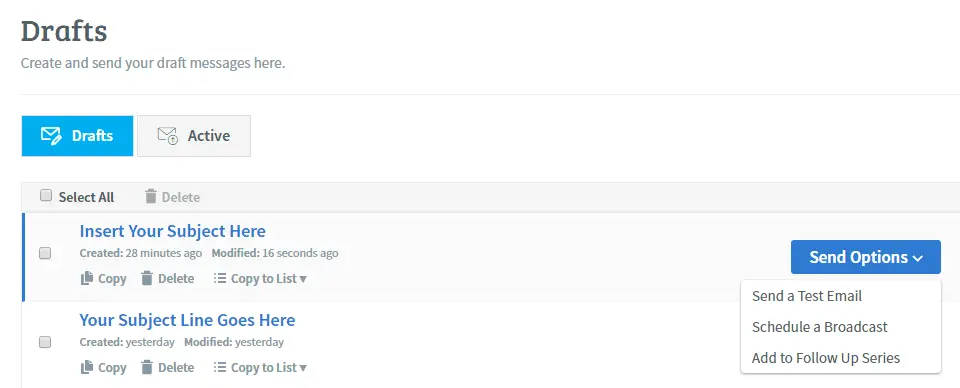
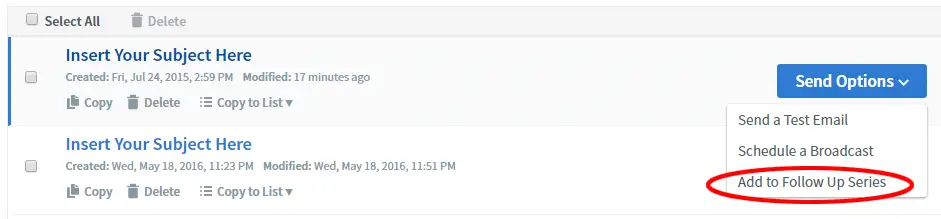
You will notice that each time you save and exit from the drag and drop builder, you will be in the drafts section of your account. This is where all of your emails will be stored. Go to your first email that you created (your welcome message) and click the ‘send options’ drop down and then click “Add to Follow Up Series”.
Since this is the first email in your follow up series, it will be sent to subscribers immediately after they subscribe to your list. You will be able to set a duration of days for subsequent emails to be sent out after the initial email.

Return to your drafts page by going to Messages -> Drafts.
You will notice that the message you added to your series is now gone from the drafts page. Add the next email you want to be the second email in your series. In the popup that appears, you can choose how many days it will be sent after the first email. You can also edit day and time settings (hint: the middle of the week is the best time to send emails out ).
Once you have all emails added to your follow up series, we can move on to creating our form in Aweber.
Creating Your Form
Now that you have a list and follow up series created, you can create the form that will be used in your auto response campaign. This is the form that you will later integrate with Lead Pages (which we will get to shortly).
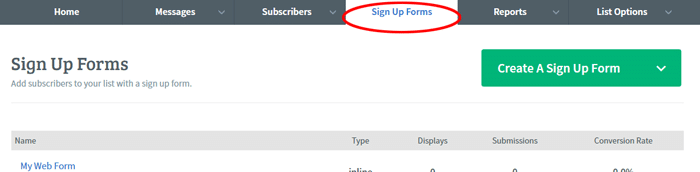
Start by going to ‘Sign Up Forms’ in the main menu.
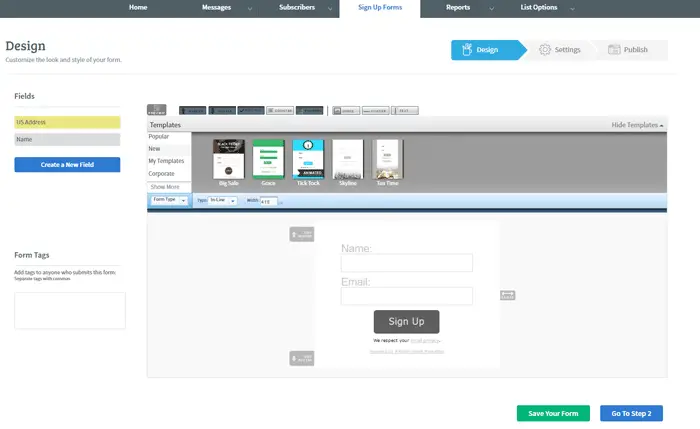
Click on the ‘Create Your First Sign Up Form’ button. Keep in mind that you will be creating this form but not publishing it. The form will be used later in the process when you integrate with Lead Pages. You will be taken to a page with the default signup form from Aweber. Note that you will not need to add fields beyond what is already there as all we are doing is collecting name and email from our subscribers. Normally you would customize your form here with different templates and style options however for the way we are using Aweber in this tutorial, you will not need to do any of that. Form styling will happen on Lead Pages later on in the campaign creation process.
Simply click ‘Go To Step 2’
Name your form something descriptive because you will see this name in Lead Pages once you go to integrate Aweber and choose your form. It also helps if you end up doing multiple campaigns. On this page you’ll also choose your thank you page (either Aweber’s default page or a custom one you’ve made on your site) as well as your already subscribed page.

In advanced settings you can add tracking to your form if you want. If you are a beginner at this or you just don’t know what to do with this section, leave it alone. The last step in the three step form creation process is to publish your form. If you are using the form on some other site besides Lead Pages, read the instructions on what to do on this page. Otherwise you are done here. Our next post on Lead Pages will show you how to configure your Aweber settings on that platform to receive form submissions through a Lead Pages landing page.