Imagine publication swiftly followed by bestseller status and royalty checks of the financial freedom variety. It’s the dream of every writer but the reality of few.
That’s pretty depressing, right?
The devastating and inconvenient truth is that most authors (even the prolific ones) barely rake in a few hundred dollars per year if they’re lucky. Their tireless reader-finding, blog-posting, community-building efforts amount to almost zilch because they don’t know how to translate these marketing activities into book revenue.
If you’re in this position, keep reading. You’re about to learn the most important thing you can do to ensure the success and sustainability of your writing career: how to build a responsive author email list.
Why is list building so important?
Well, your list is where the money is for starters. In fact, a common regret amongst authors who eventually do latch on to this strategy is that they didn’t start sooner. If you’re unconvinced, perhaps the following benefits will change your mind:
- Email remains one of the most effective ways to build trusting relationships with readers, turning avid fans into advocates.
- You have direct and immediate access to readers, allowing you to reach out on a personal, one-on-one basis.
- Unlike social media where only a small percentage of your followers will see your message, email reaches everyone.
- Compared to average click-through rates on pay-per-click campaigns, email click-through rates are higher. Best of all, you don’t have to pay a cent for those conversions.
- You have full ownership and control over your email list and the content you share. You won’t be blindsided by changes in Terms of Service or restricted by the number of emails you can send or when you can send them. You also won’t be subject to a sudden rule change that significantly cuts your visibility or drastically slashes your earnings.
- Email gives you another opportunity to extend your brand style, voice, and personality.
- Email allows you to diversify and gain independence without the fear of relying on the marketing tactics of various retailers for your income. Nor do you have to rely on the algorithms of sites like Amazon to put your book in front of browsers.
- Email is a cost-effective, efficient, and timely way to relay relevant promotional and informational content to subscribers.
- Subscribers have opted in to engage with you on a deeper level. These people are more inclined to support your work, share your message, and buy your books over a long period.
- Emails allow you to stay connected, which is crucial if your site ever goes down or your social media profiles disappear.
- People who sign up to your list are part of your target market and have given you permission to communicate with them further. You are not spamming random people. These readers WANT to hear from you.
- Through regular, meaningful, and valuable communication, you build credibility and authority in a particular genre or on a particular subject. You also grow your influence.
- You have the ability to segment your readership into different lists based on their actions. This gives you an opportunity to produce highly targeted or niche content that appeals to a specific group of fans.
- When you do make an offer, you can boost your book’s visibility and potentially launch it into bestseller status or onto lists for hot new releases. Imagine telling several thousand eager readers that your latest book is available on Amazon, Barnes & Noble, or Kobo.
The bottom line: an email list is a phenomenal asset. Without one, you’ll have a harder time gaining the traction you need to develop a financially satisfying writing career. As your community grows, your income grows.
Step 1: Build a Killer Self-Hosted Author Website

[Note: Move on to Step 2 if you already own an author website.]
If you’re like most tech-challenged writers, you probably go weak at the knees and sweat profusely at the thought of setting up your own website. There’s no need to panic, though, because the process is not as complicated or as time-intensive as you might think. In fact, you can set up a basic site in about 30 minutes or less. No kidding!
Before we get down to the nitty-gritty, it’s crucial to understand why you should opt for a self-hosted website rather than go the free route.
- Avoid digital sharecropping and guarantee complete control: Building your publishing business or writing career on digital real estate you have no control over is an incredibly risky move. You’re essentially gambling on an assumption that the owners of the free service you’re using won’t suddenly change the rules, or worse: disappear into the abyss. Self-hosting your online property ensures you have complete ownership and control over the content you produce and won’t wake up one day to find your site and subscriber list no longer exist. Sure, it might be hard to justify this spend if you’re a cash-strapped author who’s just starting out, but a small financial investment of a few dollars per month can safeguard your efforts in the future.
- Enjoy greater functionality and full customization: Free web hosting limits your ability to grow a full-fledged, customized website since most providers don’t support plugins or theme modifications. With self-hosted platforms, you have control over design elements, functionality, and features, giving you the freedom to build your author website in a way that best reflects your brand and message.
- Appear more professional and authoritative: Most Internet users can spot a free site instantly. That seemingly innocuous .weebly, .blogspot, or .typepad tagged onto the end of a domain name is a dead giveaway, often conveying that the site creator isn’t willing to invest or commit to their product. Even if you’re unfailingly devoted to building your book business online, a free site isn’t ideal if you want to display your professionalism to readers, agents, and the media. You should also be aware that free web hosting can negatively affect your search engine rankings. These platforms are notorious for displaying irreverent ads and questionable links, as well as being used by spammers to build dummy websites—factors generally frowned upon by search engines like Google.
Now that you know why we recommend self-hosting, let’s get down to the business of website building:
#1. Purchase a Domain Name and Hosting Package
Your domain name is your online address—the URL where browsers will find you. Ideally, you’ll use your author name (e.g. JohnDoe.com) or your business name (e.g. TheBookBarrel.com). If someone has already claimed your preferred domain name, consider trying variations that make the most sense for you and your readers (e.g. JohnDoeAuthor.com). Keep in mind you want a URL that’s search engine friendly for better rankings.
Your web host is the company that makes your site accessible on the Internet, as well as provides a control panel to install your content management system and manage various applications. BlueHost (https://www.bluehost.com/), DreamHost (www.dreamhost.com), GoDaddy (https://za.godaddy.com/), and HostGator (http://www.hostgator.com/) are just a few of the popular, lower-priced service providers. In fact, BlueHost currently offers a free domain with your hosting package.
#2. Install WordPress
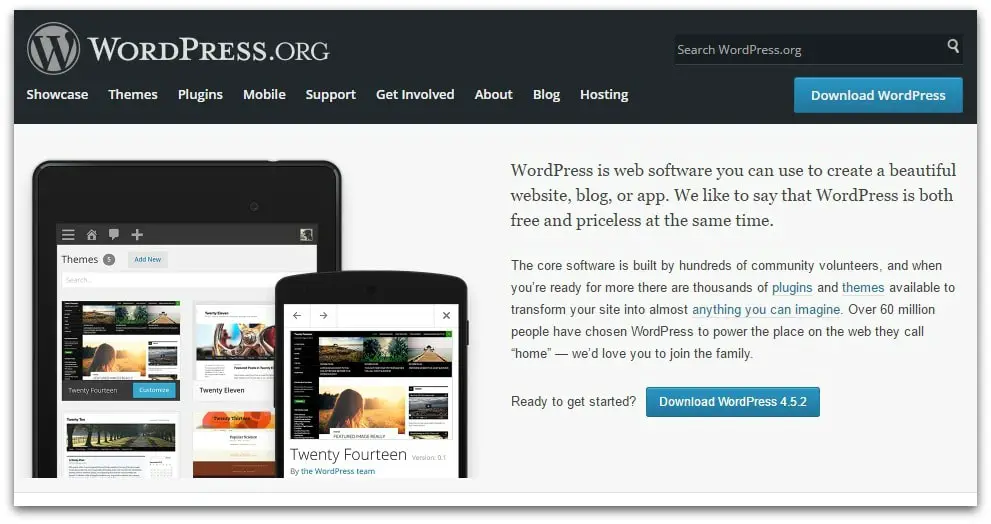
WordPress (https://wordpress.org/) is a cheap, simple, and well-supported content management system with loads of awesome themes and plugins available, making it perfect for authors. It’s important to note that you want to use WordPress.org and not WordPress.com when setting up a self-hosted site.
Once you purchase your domain name and hosting package, you’ll receive an email to confirm your account creation. From there, you’ll be able to set up a password for your hosting account, as well as log in to install WordPress. When the installation is complete, and your admin login details have been sent via email, you can access your WordPress dashboard by typing http://www.YourChosenDomainName.com/wp-admin into your search bar and hitting enter. Fill in your admin information and password to access your new website.
#3. Choose a Captivating Theme
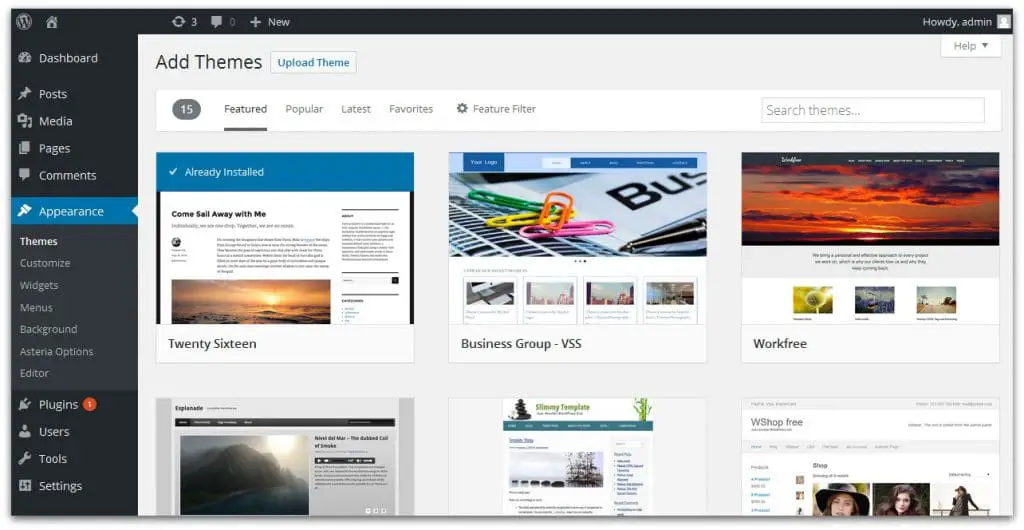
Perhaps the most exciting part of creating your author-branded platform is choosing a compelling theme you love. Simply click “Appearance” in the left sidebar of your WordPress dashboard, click “Themes,” and then click the “Add New” button at the top of the page. Search for a design that meets your functionality and aesthetic requirements and then click “Install” at the bottom of the image. You can change themes at any time, so don’t procrastinate for too long over your choice because there are thousands of options.
That’s it! You now have a functioning website you can start customizing with plugins, pages, widgets, and more. It’s important to note that a website should provide visitors with a cohesive and engaging user experience. Anything you add should be relevant and make sense for your brand.
Step 2: Create an Irresistible Opt-In Incentive
Let’s face it, “subscribe to my blog” or “join my newsletter” simply doesn’t cut it anymore. Readers need a really good reason to part with their precious contact information, which is where opt-in incentives (a.k.a. lead magnets) play a vital role in list building. These incentives are enticingly great offers that provide prospects with something of value in exchange for an email address.
Fortunately, you only need to put time and effort into the creation of these free offers—no financial investment is required. What is required is that the incentive benefits the reader in some way. Everyone already knows what’s in it for you, so focus on what’s in it for your prospects. What will make them commit to you?
What Makes a Good Giveaway?
Besides being relevant, engaging, and useful, an opt-in incentive must be value-packed, actionable, and highly targeted. Many authors have a valid concern that people only sign up for the freebie. While that’s true in many cases, fine-tuning your incentive to appeal to a very specific audience can help ensure you only generate qualified leads. Much of this boils down to understanding your target audience, so spend some time mapping out your buyer personas before you decide on an offering. Don’t forget that this opt-in incentive should only be available to individuals who sign up to your email list—exclusivity is compelling and persuasive.
Opt-In Incentive Ideas
What you give away will depend on whether you’re a fiction or non-fiction writer, as well as the subject matter you cover.
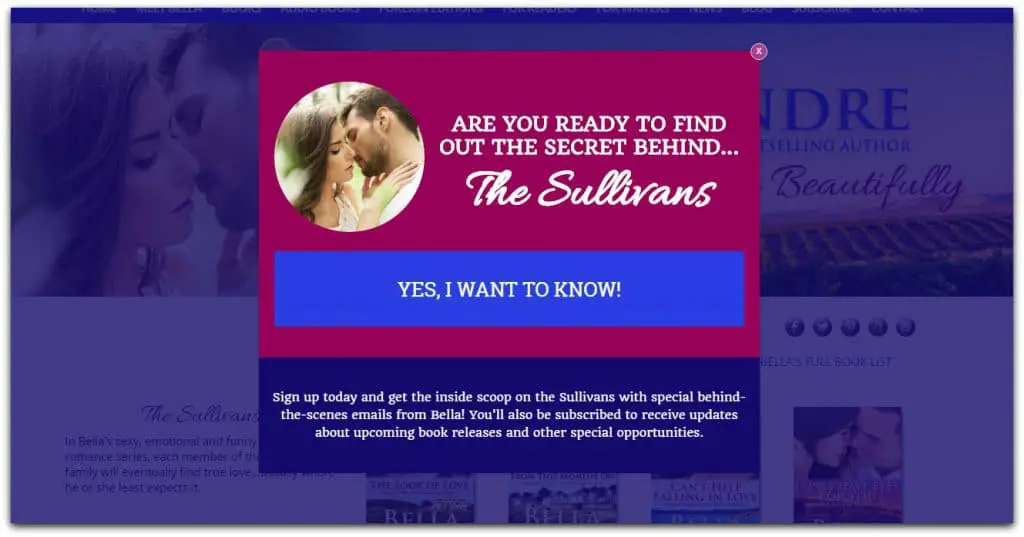
On her author website, New York Times and USA Today bestselling author Belle Andre offers a sign-up incentive that promises to reveal secrets behind The Sullivans – a popular contemporary romance series that’s sixteen books strong and growing. Readers who are part of her list and invested in this epic family saga are primed for purchasing pre-orders of her next release.
If you’re unsure what you have to offer, here are a few ideas to get you started:
- eBooks or guides
- Audio versions of your books
- Short stories or novellas
- Access to deleted scenes
- Sneak previews or excerpts
- Alternative endings
- Chapters of a book
- Bonus material
- Bundled book offers
- A behind-the-scenes look at your characters, topic, or writing process
- Secret insider information
- Exclusive, never-before-published content
- Promotion codes or discount and free shipping coupons
- White papers or research reports
- Blueprints
- Manuals
- Cheat sheets
- Resource lists
- Checklists
- Helpful worksheets or workbooks
- Case studies
- Email courses
- A special 14-day or 30-day email series
- Video courses
- Entry into a contest or giveaway
- Free online tools
- A toolkit or bundle of related materials
- Downloadable themed printables
- Downloadable DIY instructables
- Access to the answers of a fun survey or quiz the subscriber completed
- Access to a challenge
- A newsletter
- Free training
- A free consultation
- Recorded coaching calls, interviews, or keynote speeches
- Free VIP membership
Step 3: Optimize the Placement of Your Opt-In Offer
Put your free offer in prominent, high converting locations. Where might those be? Although you’ll need to monitor traffic and assess the analytics of your website, here’s a list of popular pages and positions for sign up forms.
#1. On Your Homepage – Some homepages are geared towards building an email list. While setting up your entire page as an opt-in form might not make sense for you, your homepage is certainly a place where your giveaway will capture attention.
#2. On Your About Page – The About Page is one of the most frequented pages on a website, making it a perfect spot for a signup form.
#3. Within Blog Posts – Blog posts offer an excellent opportunity to entice reader’s with a freebie that’s relevant to the topic.
#4. At the End of Blog Posts – If people liked your content enough to read to the end, imagine how psyched they’ll be to discover a free offer there.
#5. At The Footer of Your Site – In the same vein as #4, visitors are engaged with your content by the time they reach the bottom of a page. A free offer at the footer is highly likely to convert.
#6. On a Dedicated Opt-in Landing Page with No Distractions – A dedicated landing page gives you the space to elaborate on your offer while eliminating any distractions that might otherwise lead visitors away from the signup form.
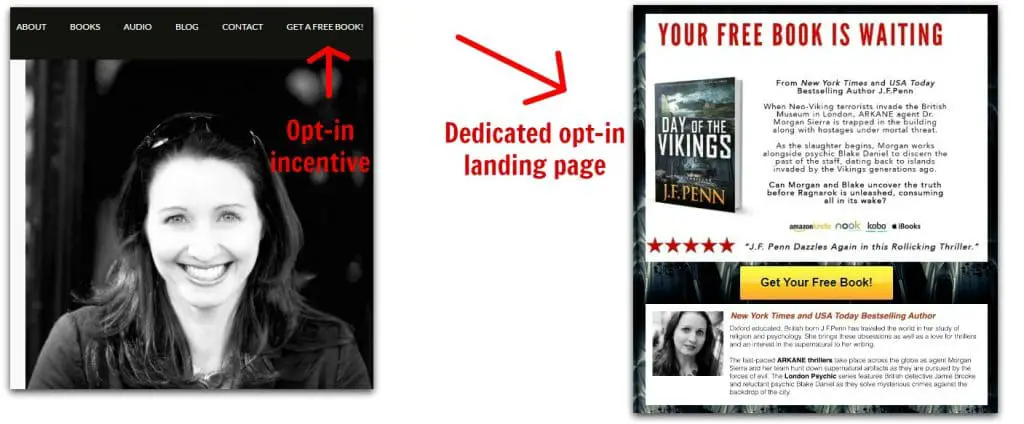
Bestselling thriller author Joanna Penn (a.k.a. J.F. Penn) includes a “GET A FREE BOOK!” tab at the top of her author website. It leads to a well-designed opt-in landing page with no other links or distractions. Notice how she requires readers to click her call-to-action button before accessing the signup form. While some authors find the extra step can boost conversion rates (go figure!), others find it increases resistance. Consider A/B testing this to see which version works best for you and your particular offering.
#7. On Your Resources Page – If you have a page assigned to books, guides, tools, and other resources, this is an ideal spot to add your offer.
#8. At the Top of the Sidebar – This prime location is one of the first places site visitors look when searching for newsletter sign ups or free content.
#9. On the Bar Across the Top of Your Site – This prominent location is a great place to grab your reader’s attention right off the bat. (Recommended plugin: HelloBar (https://www.hellobar.com/)
If you want to install a popup signup form that catches visitors just before they leave, consider using a plugin like List Builder (https://sumome.com/app/list-builder). Another option is Scroll Box (https://sumome.com/app/scroll-box), which activates as visitors are scrolling.
Step 4: Create an Account with a Reliable Email Marketing Service
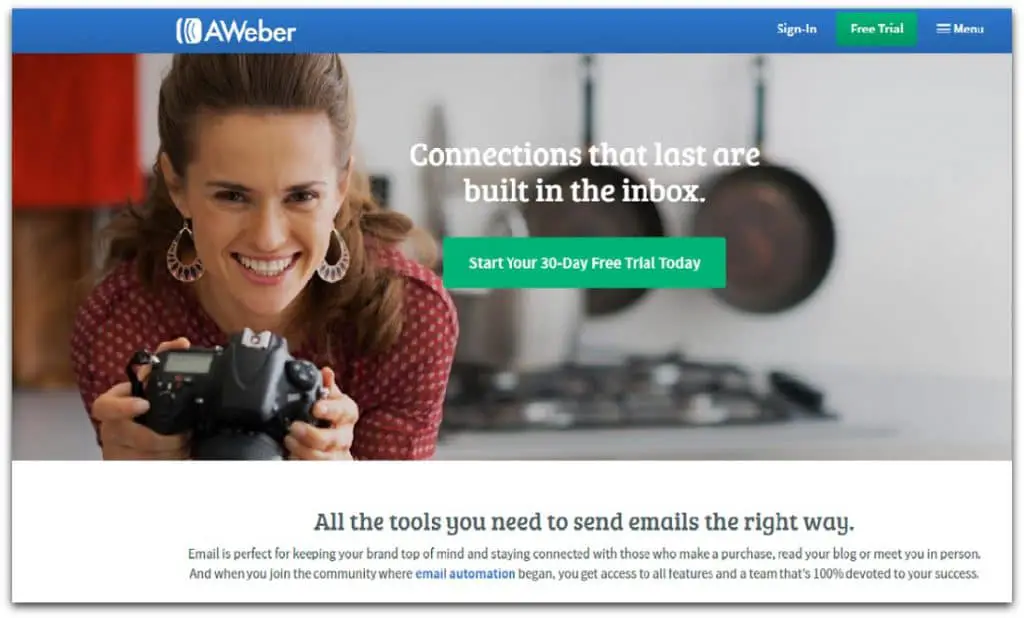
Your email marketing service platform is where you’ll store captured leads, manage your list, and send bulk emails. While there are thousands of providers to choose from, Aweber (http://www.aweber.com/) and MailChimp (http://mailchimp.com/) are user-friendly, inexpensive, and reliable. You can easily scale your list, segment your leads, export addresses, set up an autoresponder series, send individual emails, and view your email tracking and analytics. The best part is you don’t need programming or design skills to create beautiful emails that capture attention. These service providers are also legally compliant, helping you abide by anti-spam laws.
What to Do After You Sign Up
Before you proceed with the following steps, remember to: a) save your settings before moving on to the next task, and b) provide relevant URLs if you choose to redirect to self-hosted, customized pages.
- Create your first email list. The process for list creation is slightly different on each platform, but you’ll definitely be asked to provide a list name, default “from” name, and default “from” email address. If you’ll be creating multiple lists, consider naming the list after the opt-in promotion you’ve created or something equally as relevant to ensure there’s no confusion down the line.
- Set up your signup forms. You’ll add these forms to your blog or website, so spice them up with an image, copy that highlights the benefits of the offer, and a compelling call to action. Be sure to consider their placement (see Step 3) before you start customizing their style and content. You should also decide what data you want to collect, keeping in mind that every additional form field creates a barrier. A name and email address will usually suffice. Field data from these forms can be used to personalize certain emails and thank you pages. You can also create self-hosted forms if you prefer.
Once you’re happy with your signup form, save your settings. The method you use to integrate forms into your website depends on several factors including the type of form you’ve created, the content management system you’re using, and the options your chosen email marketing service provides. For example, WordPress.org supports MailChimp’s form plugins, embedded forms, and form URLs. Installation methods vary. Aweber, on the other hand, simply requires you to copy and paste a snippet of code into a WordPress text widget. Check with your service provider to determine how this works for your particular situation.
- Create a signup “Thank You” page. Although some list owners leave things at the initial sign up, a double opt-in can help reduce spam and ensure your prospect actually wants to receive further correspondence from you. Whether you use your service provider’s default “thank you” page or customize it to suit your needs, this page should ask subscribers to check their email for a confirmation message.
- Create a “Confirm your subscription” email. This email contains a link subscribers must click before being added to your email list. Again, you can use the default message, or you can customize the email to suit your brand and voice.
- Set up a confirmation “Thank You” page. This page appears after the subscriber clicks the link in the email. You can optimize it to include a welcome or thank you message along with social media links, relevant blog post links, recommended reads, and more. Most importantly, you need to tell subscribers that they’ll soon receive an email with a link to the opt-in incentive. Depending on the functionality available through your service provider, you might want to consider building this page on your site so that you can fully customize it with widgets, plugins, and other design elements.
- Create a “Welcome” or “Follow-Up” email. If you did not welcome a subscriber to your community on the confirmation thank you page, you can do so in this email. You also need to include the necessary information, download link, or video for the giveaway.
- Create an autoresponder series. A collection of follow-up emails offers a prime opportunity to start building a relationship with subscribers. Whether you set these emails up to include answers to frequently asked questions, deeper insights into your work, reading recommendations, other free offers, or relevant content, you can help people get to know you and your work without being too salesy about it. They’re more likely to pre-order your next book or purchase published works if you add value with every interaction.
Step 5: Engage in Marketing Activities Designed to Drive Targeted Traffic and Supercharge Your Email Subscriber Growth

Now that you have your writing platform and opt-in incentive nicely set up, it’s time to get those all-important eyeballs on these properties. Even though new marketing tactics are surfacing every day and it’s become impossible to implement them all, here’s a solid list to get you started:
- Ask family, friends, neighbors, co-workers, and members of your offline social groups to check out your website and spread the word.
- Optimize your site for search engines.
- Add a sharing widget to your confirmation “Thank You” page. Link it to your opt-in landing page and add some compelling copy asking people to spread the book love.
- Invite people to grab your free giveaway by adding a one-liner and link in your email signature.
- Promote your opt-in offer to your social media followers.
- Make one of your books, novellas, or short stories perma-free. Place a visually appealing image advertising your offer, as well as link to your landing page, in both the front and the back of the book. To make a book perma-free on Amazon, set the price to $0.00 at other online retailers including Nook, Kobo, and iBooks. Email KDP Support with links to these major competitors and ask them to price match. Voila! Within 1-2 days you’ll have a perma-free promotion that’s generating downloads, increasing your visibility, and driving traffic into your funnel.
- Just as you’ve added the landing page link and an image promoting your offer to the front and back matter of your perma-free book, do the same with your paid books so that paying customers have an opportunity to join your email list too.
- Set up a BookBub (https://www.bookbub.com/partners), ReadingDeals (http://readingdeals.com/submit-ebook), or similar promotion to grow your audience.
- Look for guest posting opportunities and add a link to your opt-in landing page in your author bio.
- Optimize your social media profiles with links to your website.
- Invest in a Facebook ad that compellingly promotes your free offer.
- Collaborate with other writers to run a joint email campaign, host an event, or promote a giveaway. All authors involved should advertise it to their own lists, effectively expanding everyone’s reach, readership, and email list.
- Generate publicity for your author brand by getting involved in book blog tours.
- Create interesting, reader-centric email content that makes people want to stay subscribed and forward your message to others.
- Create additional lead generation offers as your email list grows.
- If you have a Facebook Author Page, add a sign-up call-to-action button.
- Conduct a podcast outreach. This is a great way to introduce yourself to a new audience while plugging your website and free offer.
- Create a pinnable image of your offer that readers can easily share on Pinterest.
- Collect email addresses at offline book fairs and other events.
- Write relevant and engaging blog posts that are optimized to rank well.
- Connect with influencers such as bloggers, authors, industry experts, and business owners who could potentially endorse your books in the future and amplify your word-of-mouth marketing.
- Offer list owners a free consultation or sample of your work. You might be rewarded with a plug, as well as a valuable testimonial you can use as social proof.
Step 6: Measure and Modify
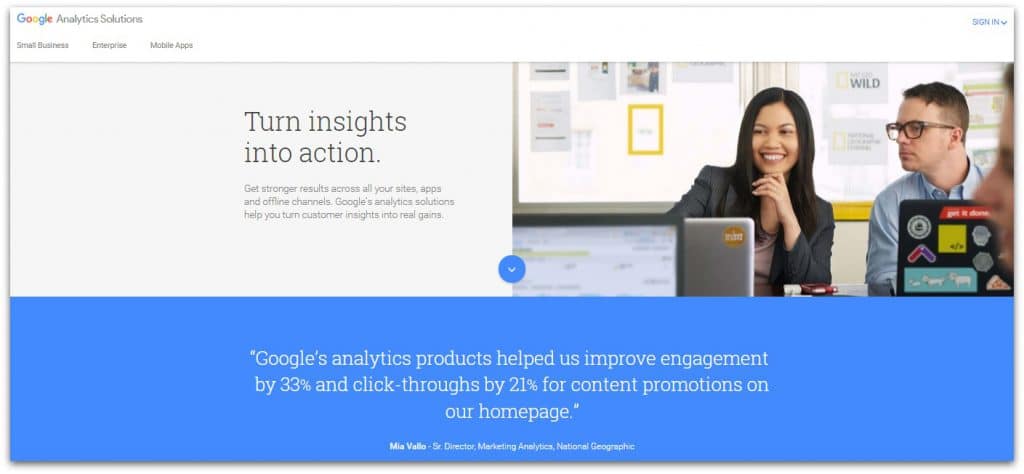
Tracking results and adapting your strategy accordingly is an integral part of successful marketing. Your metrics are simple here: website traffic and sign-up conversions. Once you understand what you’re doing wrong, as well as what you’re doing right, you can optimize your efforts and improve results. Create a Google Analytics (https://analytics.google.com/) account to help you understand where your traffic sources are coming from and where you should focus your attention.
A Final Word
Retail sites like Amazon are not marketing strategies. They can change the game at any minute, leaving you out in the cold with no hope of generating a sustainable income. If you’re serious about establishing a career as an author, take control and start doing the single most important thing a writer can do in today’s competitive market.
Email marketing: it’s how you turn your promotional activities into book revenue. Don’t doubt it. Start building your list today.
Are you an author struggling to build an email list? Perhaps you’ve already conquered this marketing Everest and have tips to share. Join the conversation by leaving your comments below.

